Tool Support
Tool Support
SpeakHDL is currently in a prototype stage of development. The API library was built with Vivado 17.05 encryption tool which means It should be forward compatible with newer versions of Vivado, but have only been tested with Vivado 2018.1 and Vivado 2019.2.
Vivado Project Creation
Vivado Project Creation
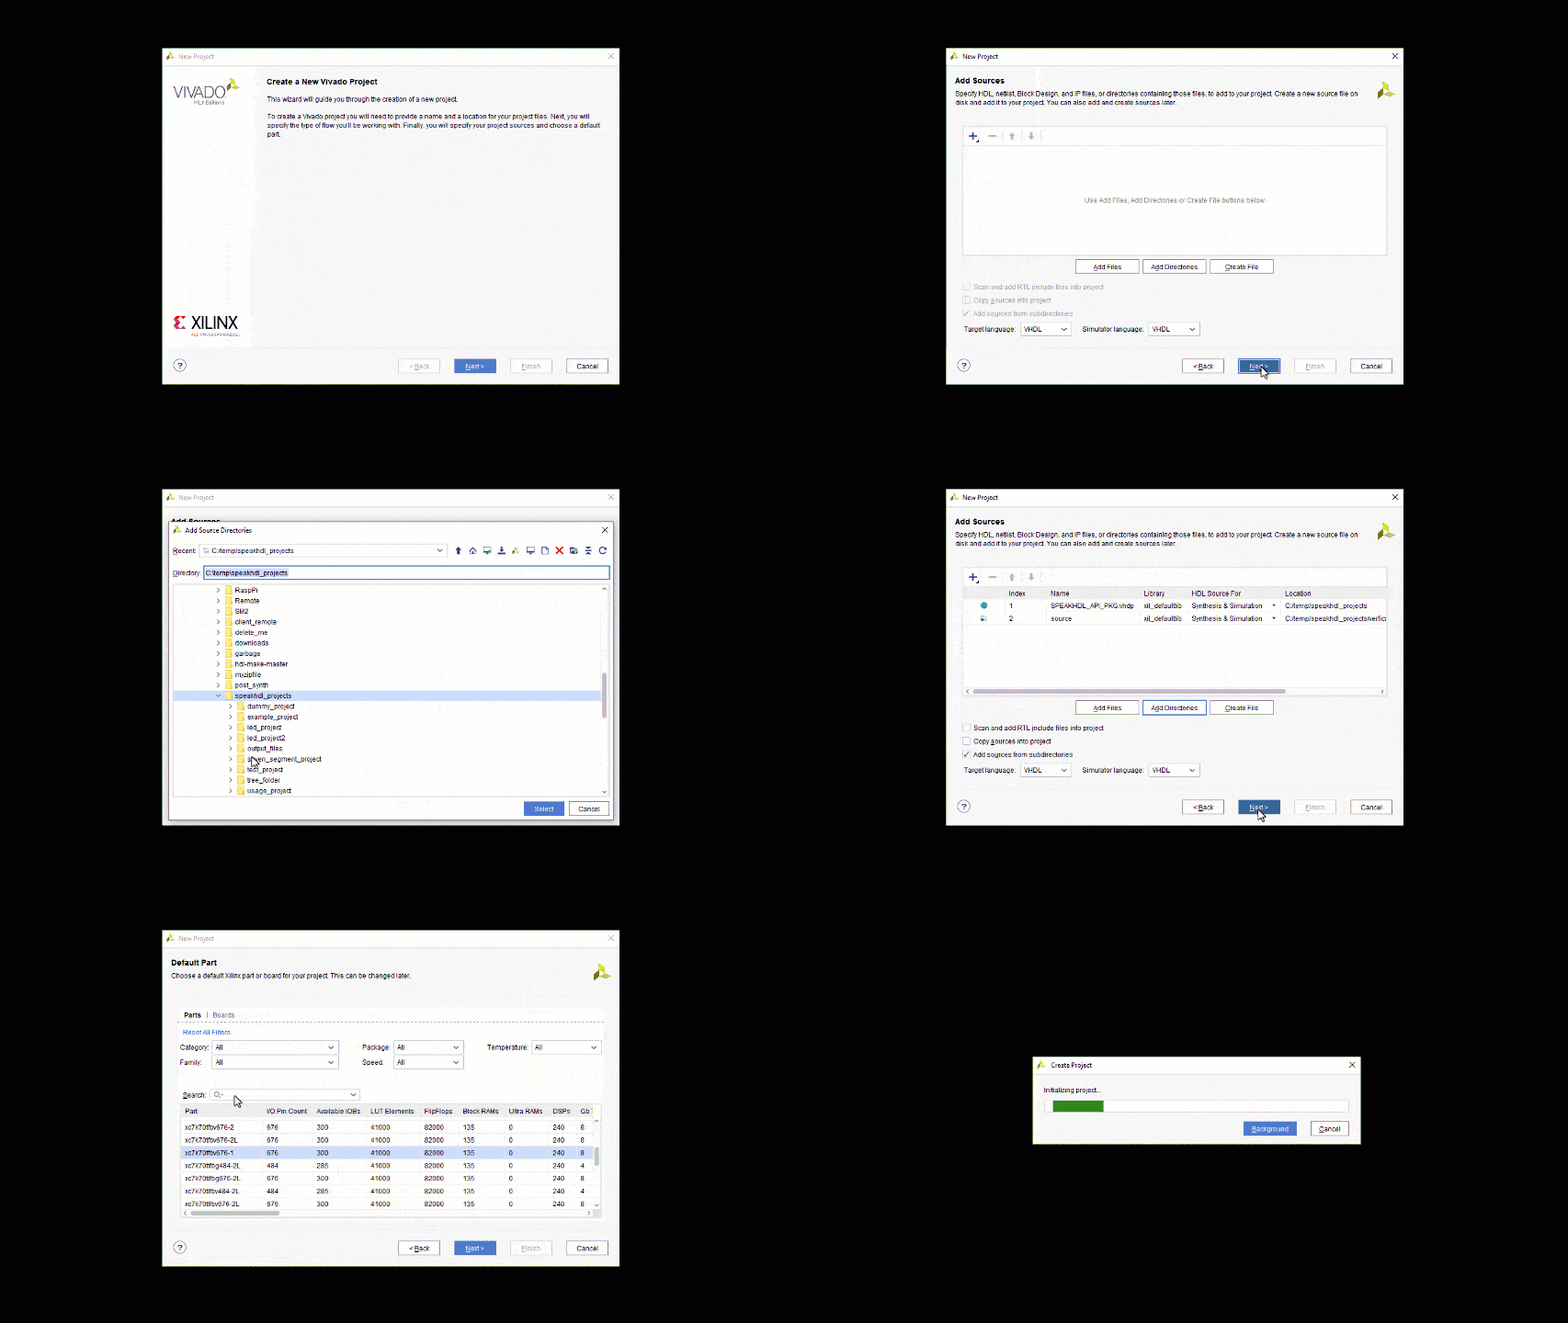
Setting up a Vivado Project for simulation and synthesis of SpeakHDL generated output files typically involves 5 steps. Three steps relate to adding the necessary input files into the project. The fourth step is to select the user specific FPGA part number. The last step to ensure that the testbench file is only used during simulation and not during synthesis.
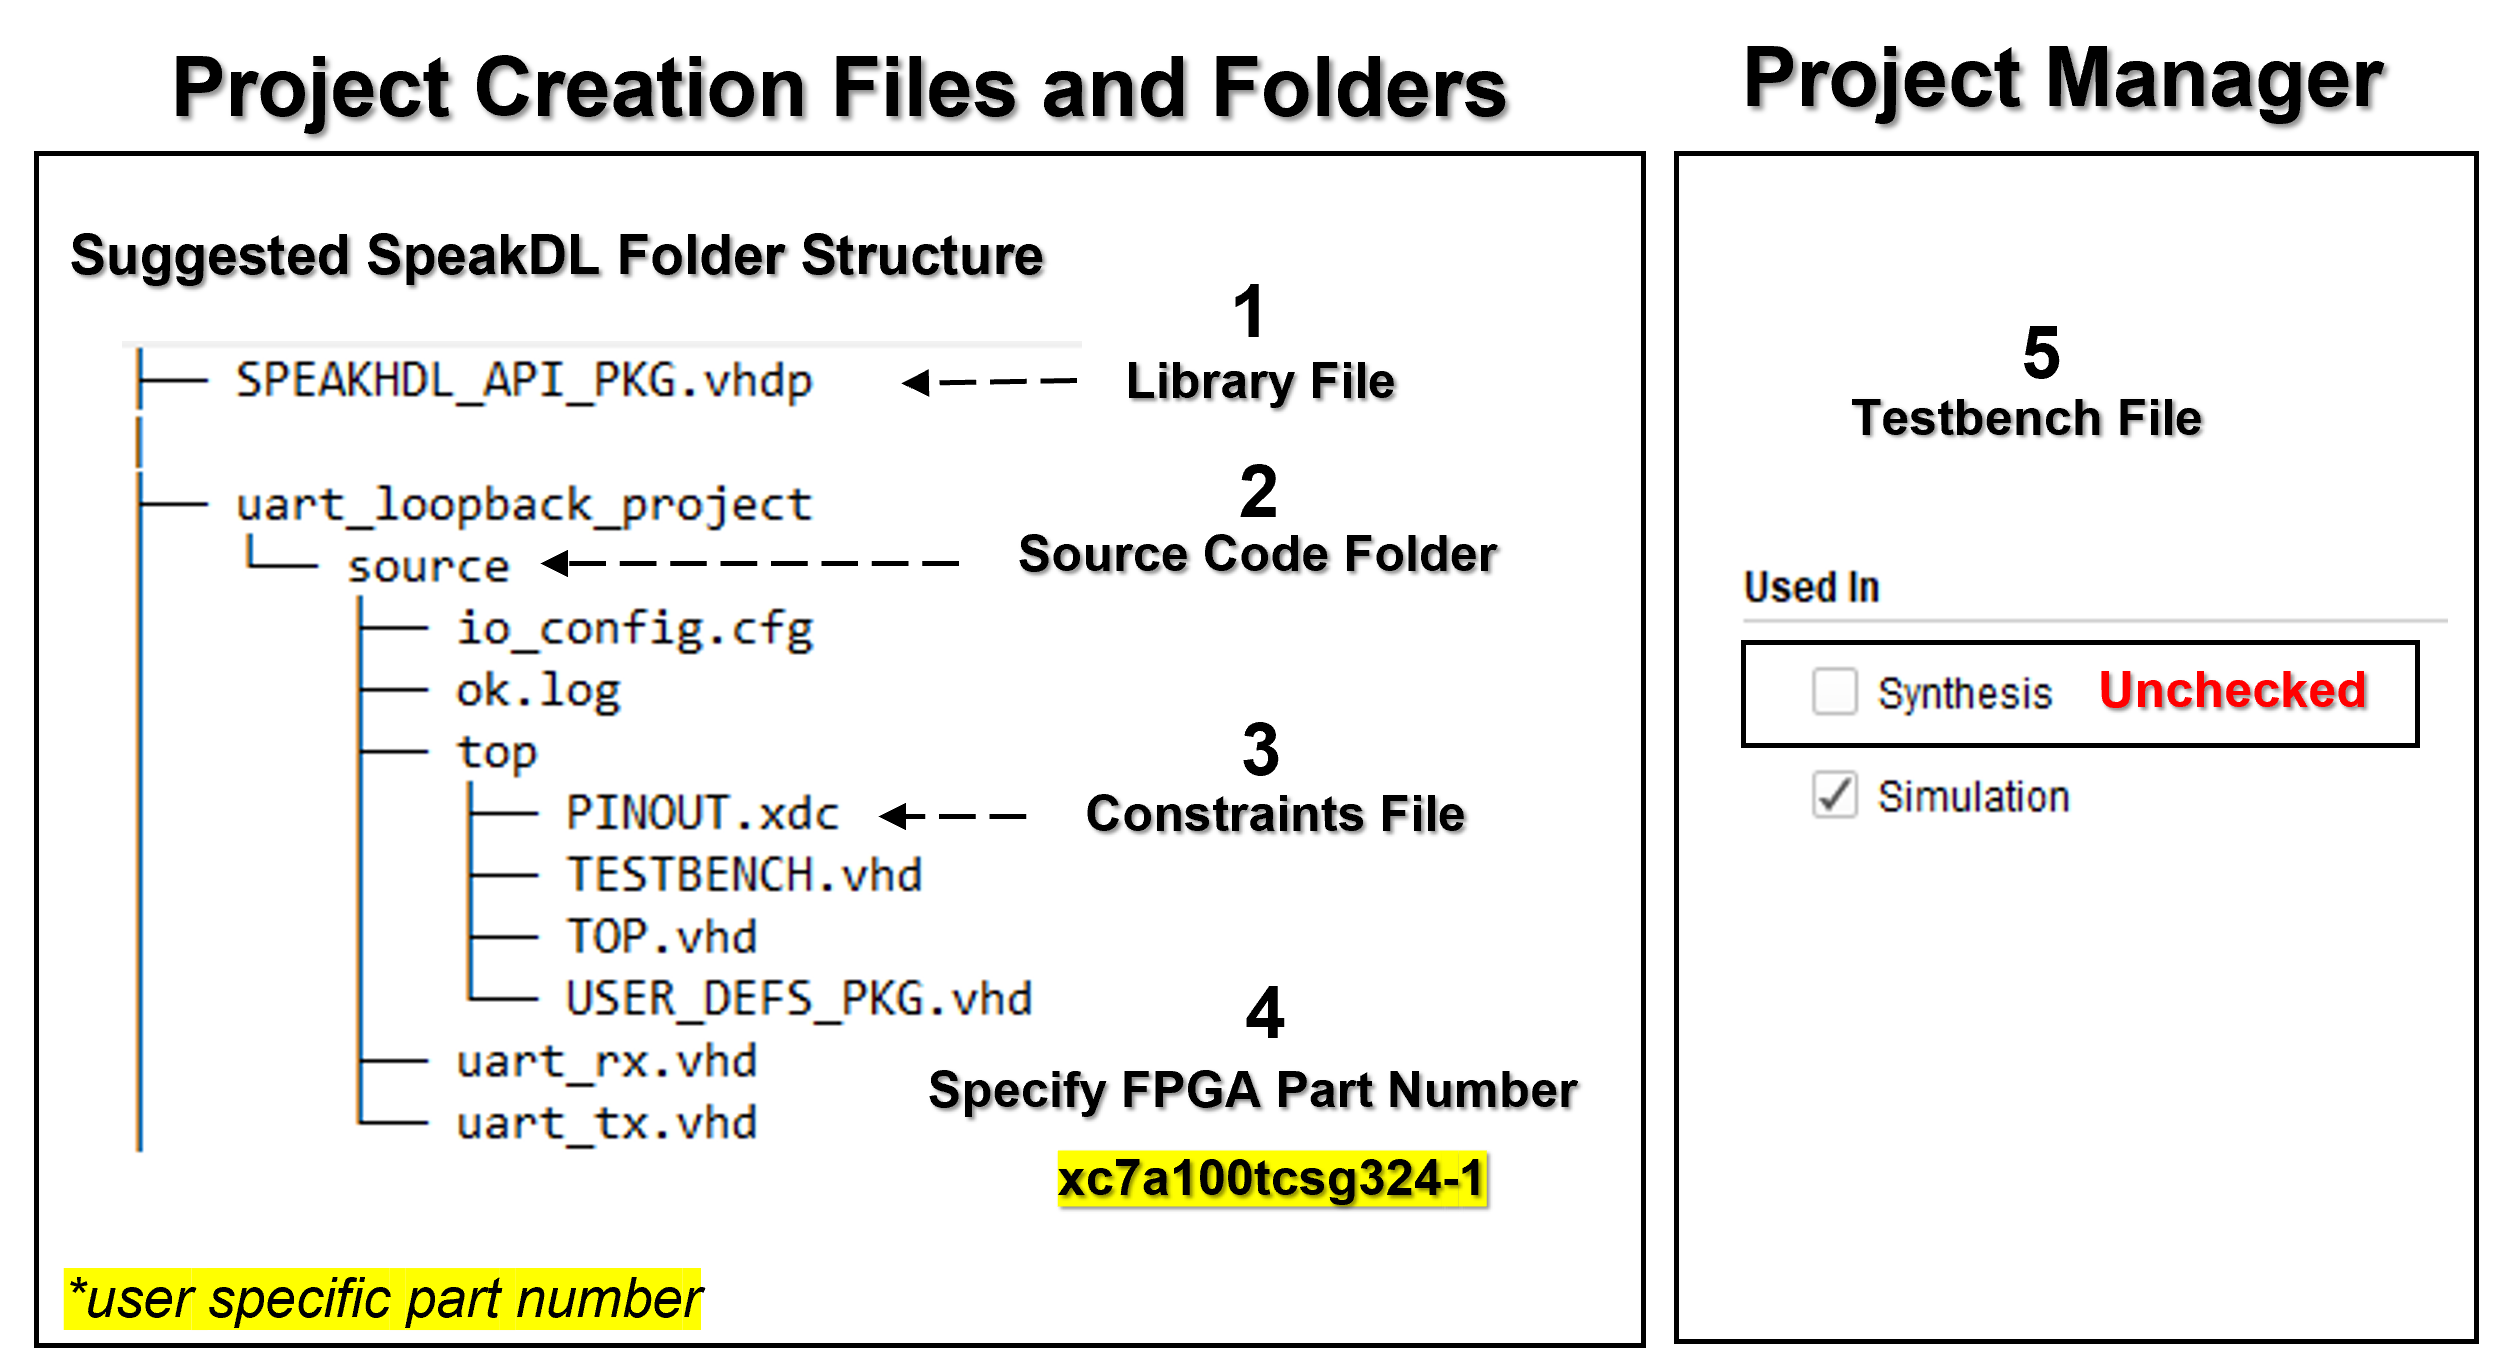
The steps for setting up the Vivado project are shown below:
- Add the SpeakHDL Library file to the Vivado Project
- Add the source code folder containing all .vhd files (recursivly) to the Vivado Project
- Add the PINOUT.xdc constraints file located inside the top directory to the Vivado Project
- Select the FPGA part number used in the design
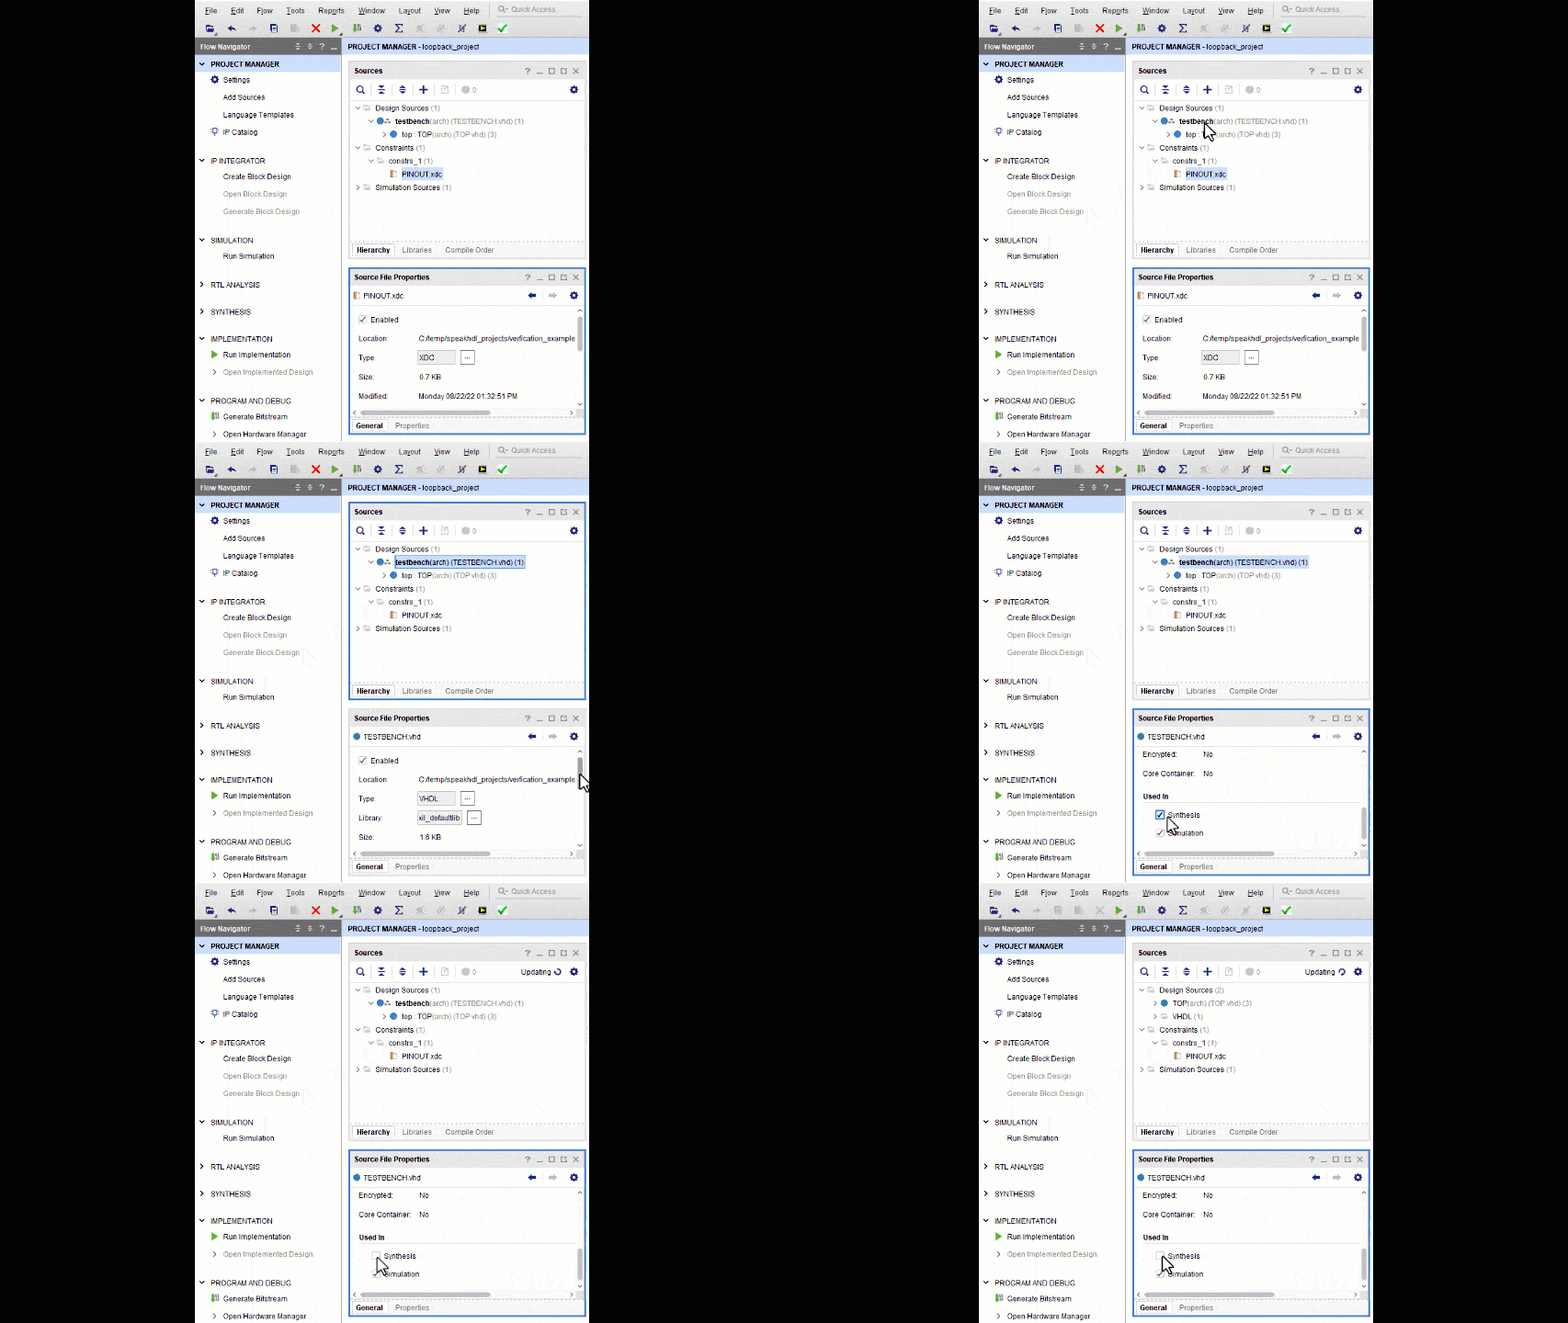
Once the project is created, to ensure that the testbench file is only included during simulation and not during synthesis:
- Uncheck Synthesis in the TESTBENCH.vhd file properties
- Warning
- If the TESTBENCH.vhd file is used as the top level file during synthesis, it will result in an erroneous synthesis run containing no usable logic.
Vivado Project Creation
Vivado Simulation
Vivado Simulation
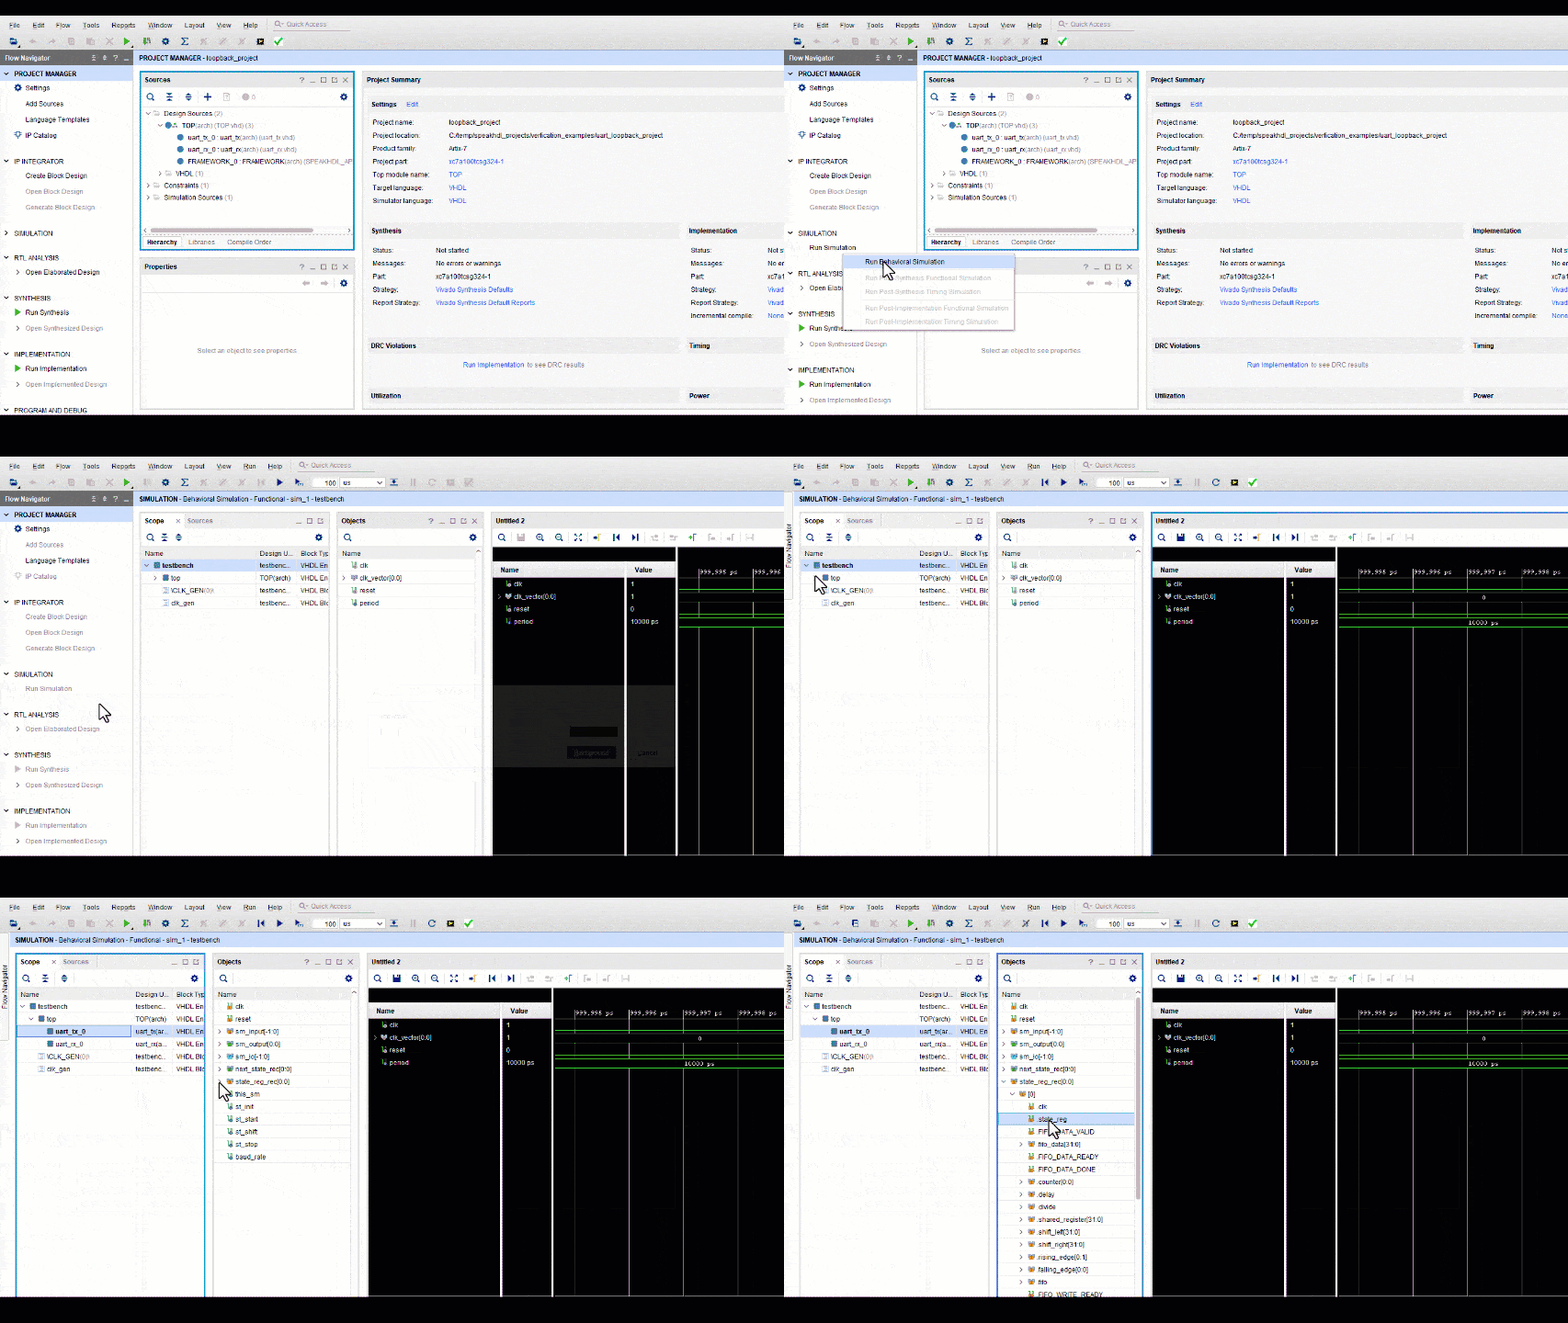
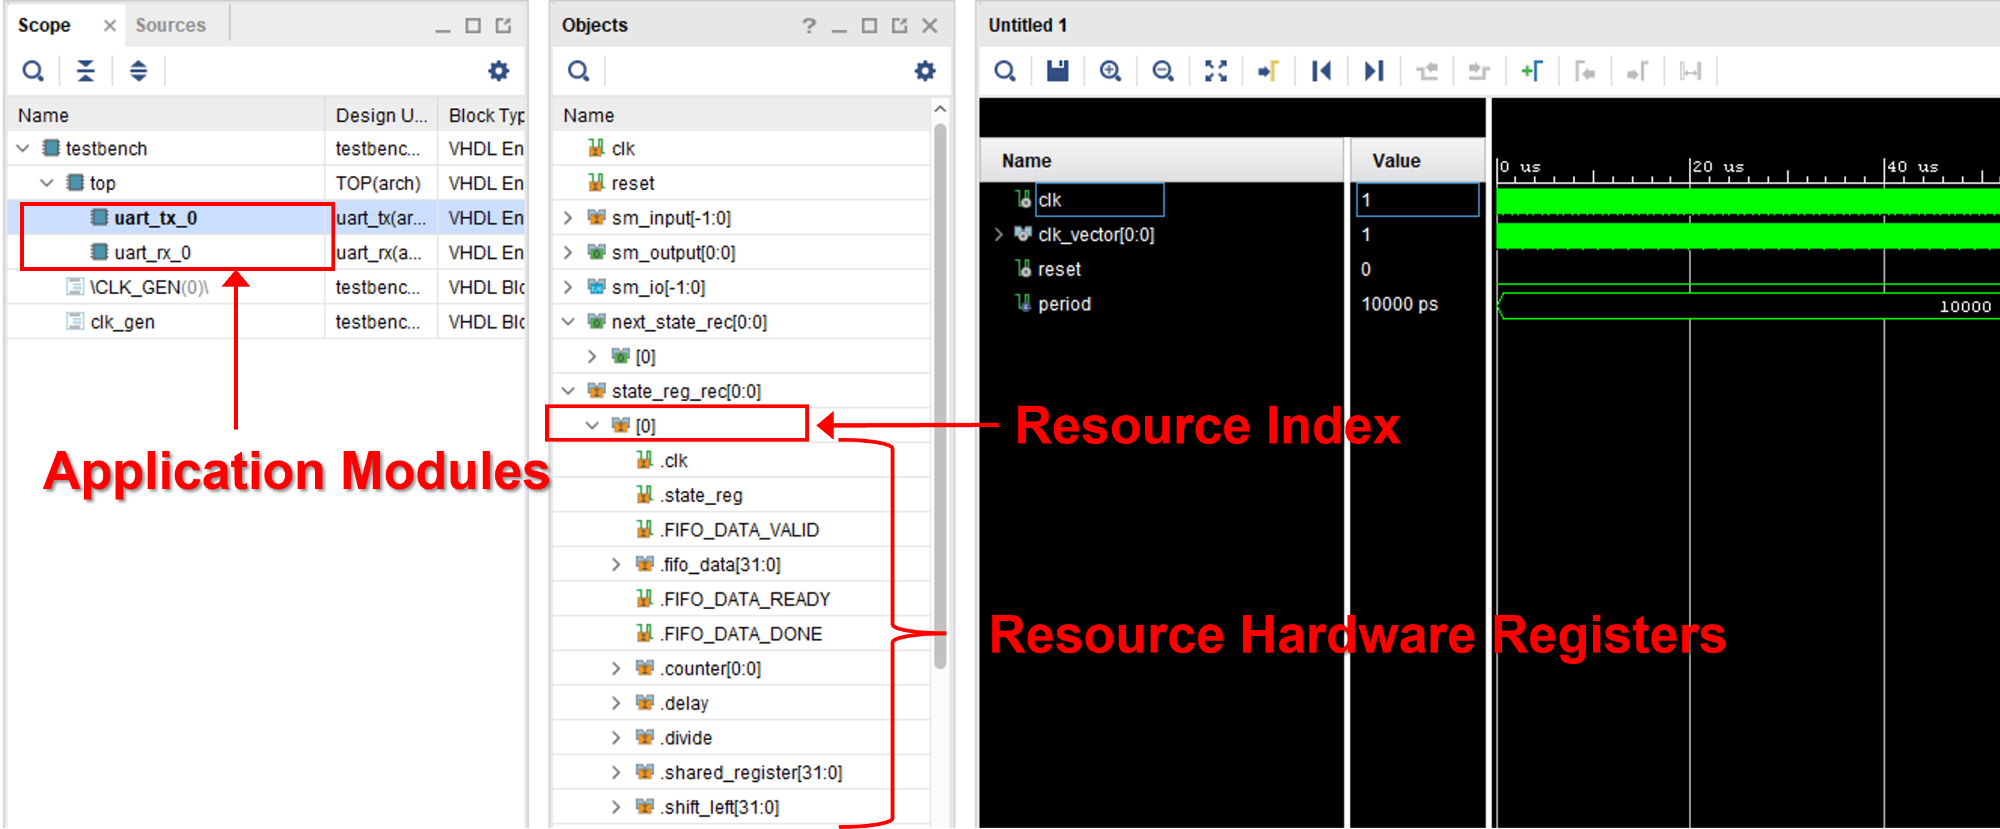
When simulating a SpeakHDL design in Vivado, it is the state_reg_rec[0:N-1] array structure that is of most interest. This data structure contains all the resource hardware registers that have been configured by procedure calls. The next_state_rec[0:N-1] array signal provides little to no value during simulation. When running a simulation, the user user selects the waveform values from each resource index that that is assigned to a particular application module. Due to the uniform nature of the design pattern, each application module has access to an set of hardware component's on each index.
- Note
- If any changes needed to be made to the vhdl design, the ok command will need to be given before the simulation is re-run. Failure to give to ok command after making a design file change could result in a compile error.
Vivado Simulation
Vivado Synthesis and Bitstream Generation
Vivado Synthesis and Bitstream Generation
At a high level, creating a .bit file for from source files in Vivado is a three step process. However, behind the scenes, many more intermediate steps take place. In order to streamline the flow, Vivado offers a project mode of operation which allows for use of a GUI for sequencing steps and also a non-project mode which can be run from the command line. Both flows have their respective advantages and supporting use case.
Vivado Project Mode
Vivado Project Mode
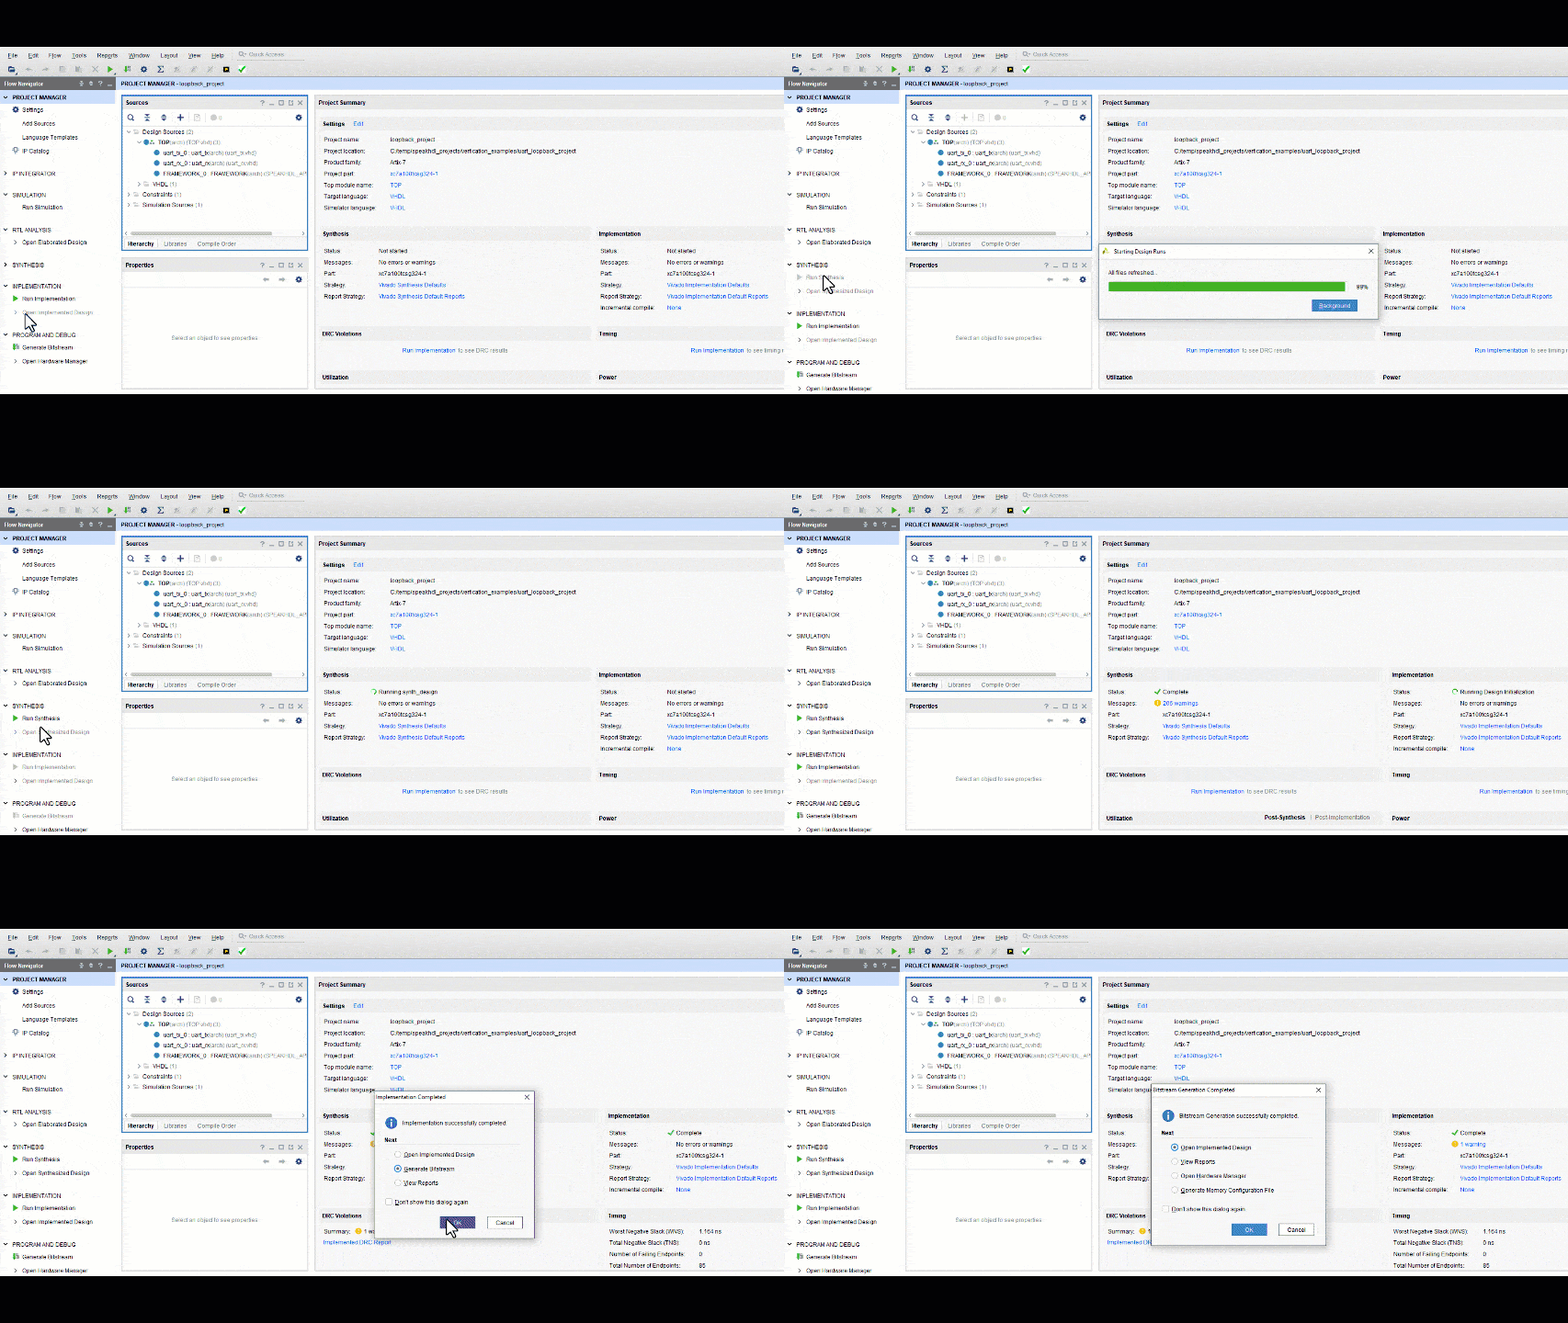
When using Vivado in Project Mode, the steps for creating a bitstream can be run sequentially and require user interaction with the GUI. From the Vivado project manager each step can be done by clicking the first step and waiting for the process to complete and then selecting the next step from the pop up window.
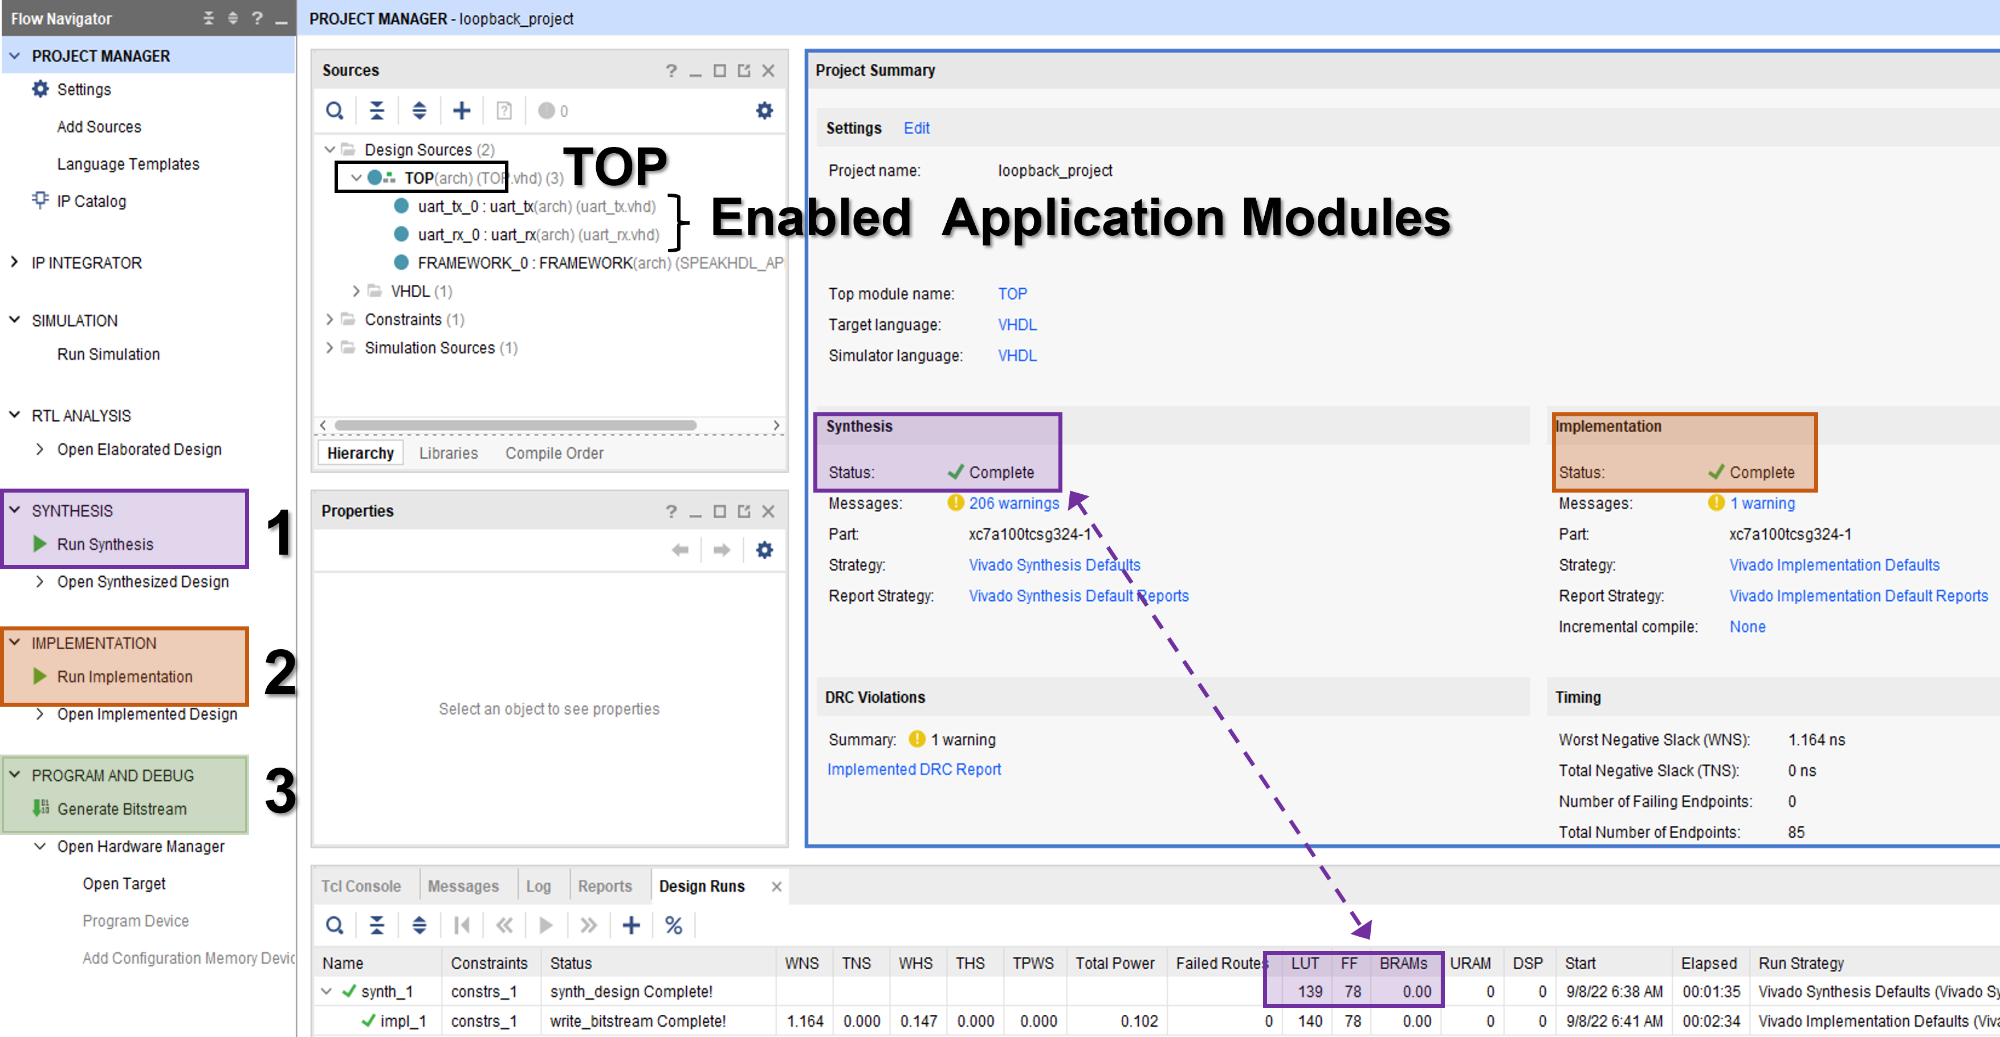
In project mode, it is recommended to run the synthesis first and wait for the result before running the other two steps. Inspect the synthesis Look Up Table and Flip Flop usage in the Design Runs Tab can give the developer a good feel as to if something has been left out of the design. The most notable things that have occurred when the LUT and FF usage is :
The most notable mistakes that have could have occurred when the LUT and FF usage are zero or unexpectedly low are:
- Under Design Sources, the top level design is set to ' TESTBENCH ' and should be ' TOP '. This happens when the testbench file needs to be removed from synthesis .
- Some application modules were left as disabled and should have been re-enabled before synthesis
- Note
- If Generate Bitstream is selected before Run Synthesis or Run Implementation, Vivado will automatically perform all the prior necessary steps to complete the operation.
Vivado Project Mode
Vivado Non-Project Mode
Vivado Non-Project Mode
Synthesis and bitstream generation can be performed from the command line in non project mode. Often time this method is much faster than using project mode due to the fact that one can does not have to save temporary files. A sample tcl which can be modified to perform synthesis and bit file generation is included below.
